1. To set a custom domain name in blogger.com you need to create an account first.
2. Just go to "www.blogger.com" and sign in with your gmail account. Select blogger profile.
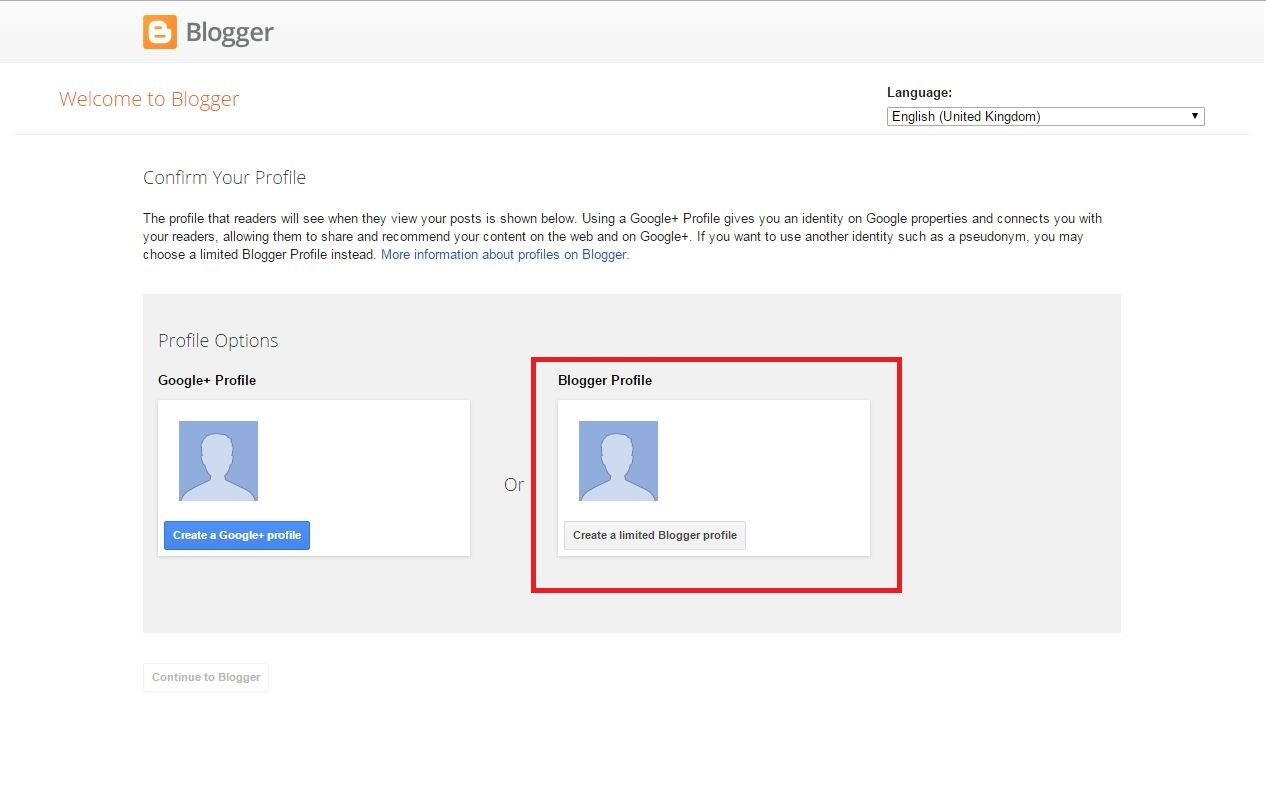
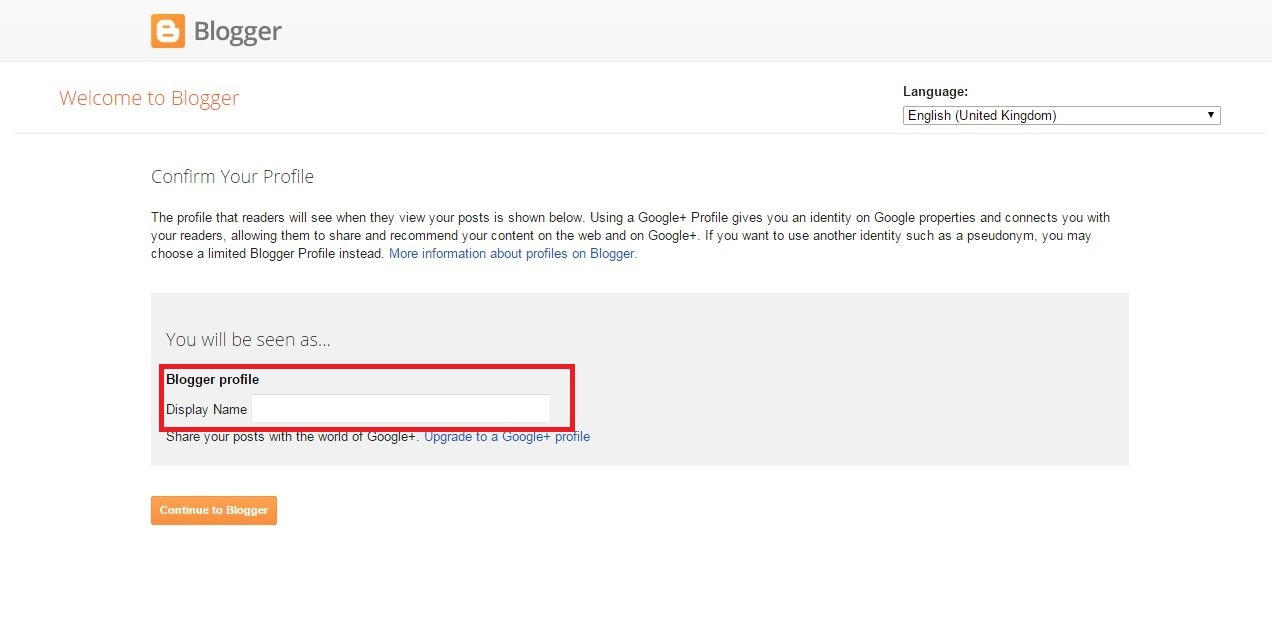
3. Enter your display name and continue to blogger.
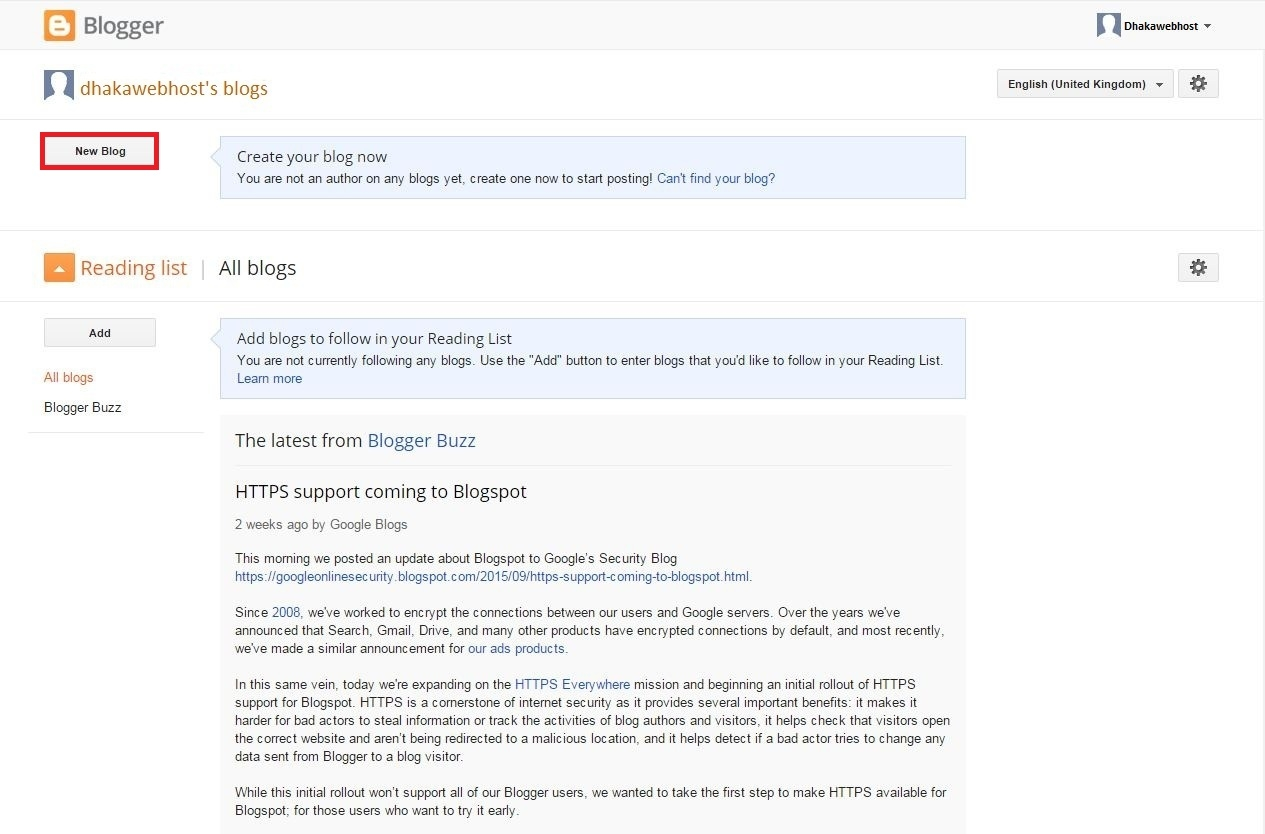
4. Click on "New Blog" and enter your title, blogspot name and select a template then click "create".
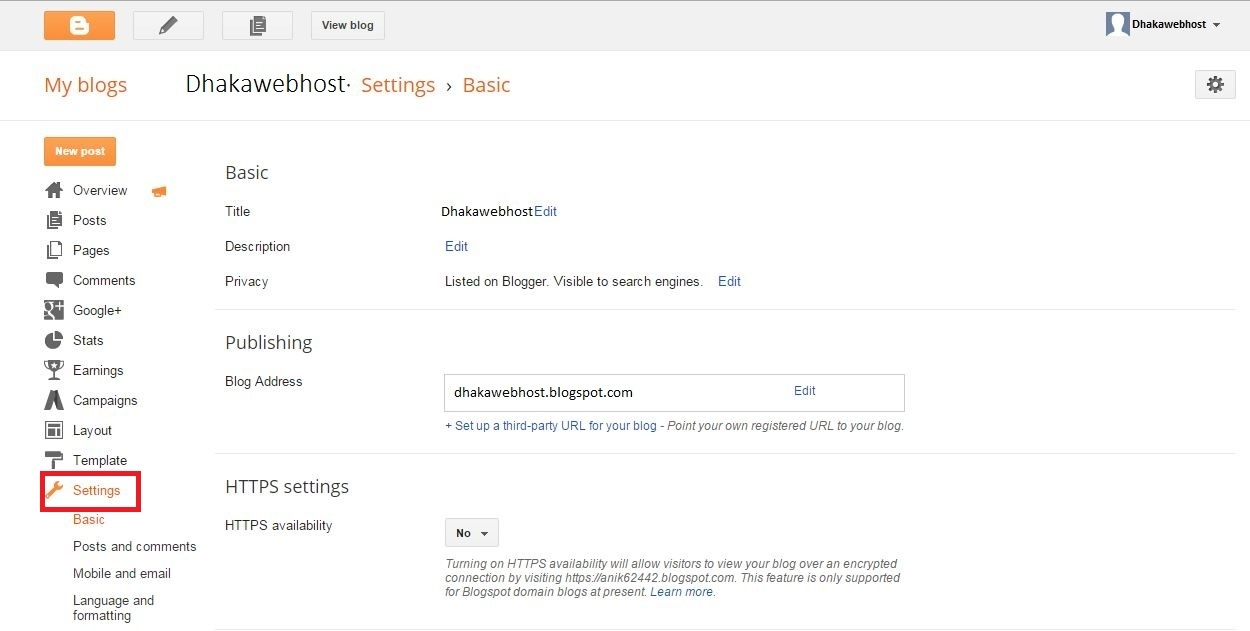
5. After redirecting to the home page find and select setting option from the left side of the home page.
6. Now click on "Set up a third-party URL for your blog".
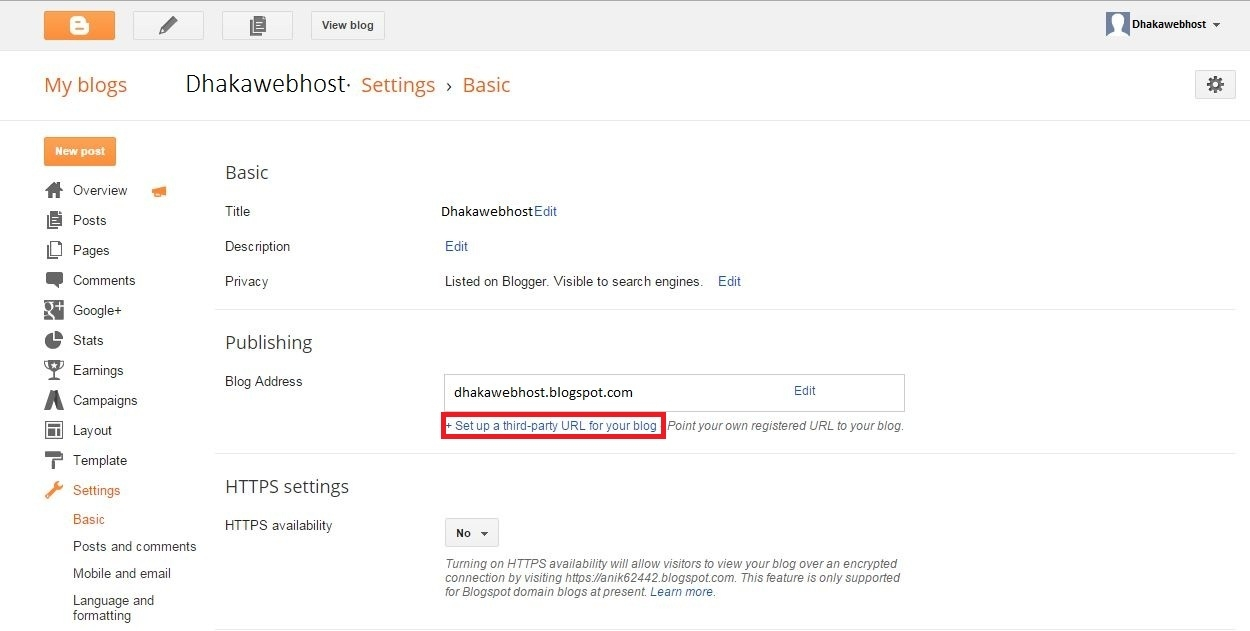
7. Enter your desired domain in the box which you want to link up with the blog and click on "Save".
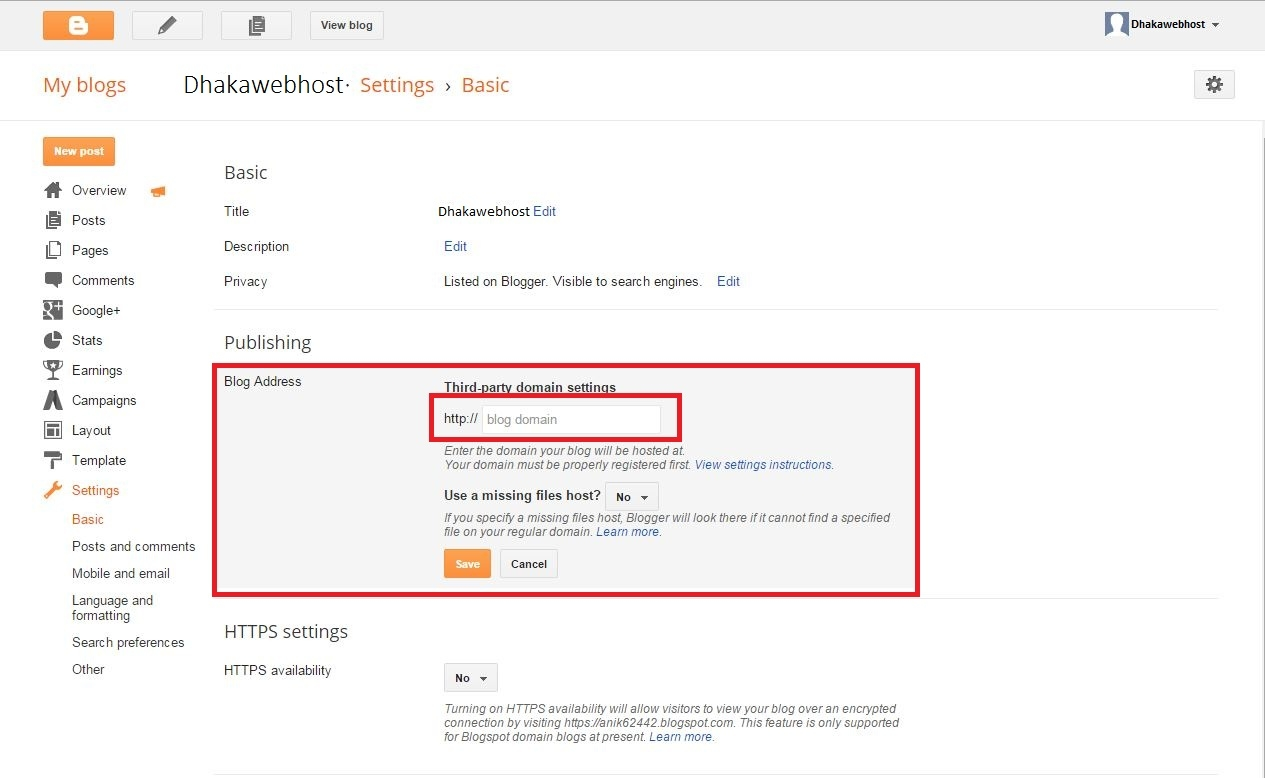
8. After saving you will get "Host name" and "Destination". Do not click "Save" here.
9. Now open a new tab in your browser and go to our website(www.dhakawebhost.com) and login to your client area.
10. Click on "Domains", you will see your domainlist here.
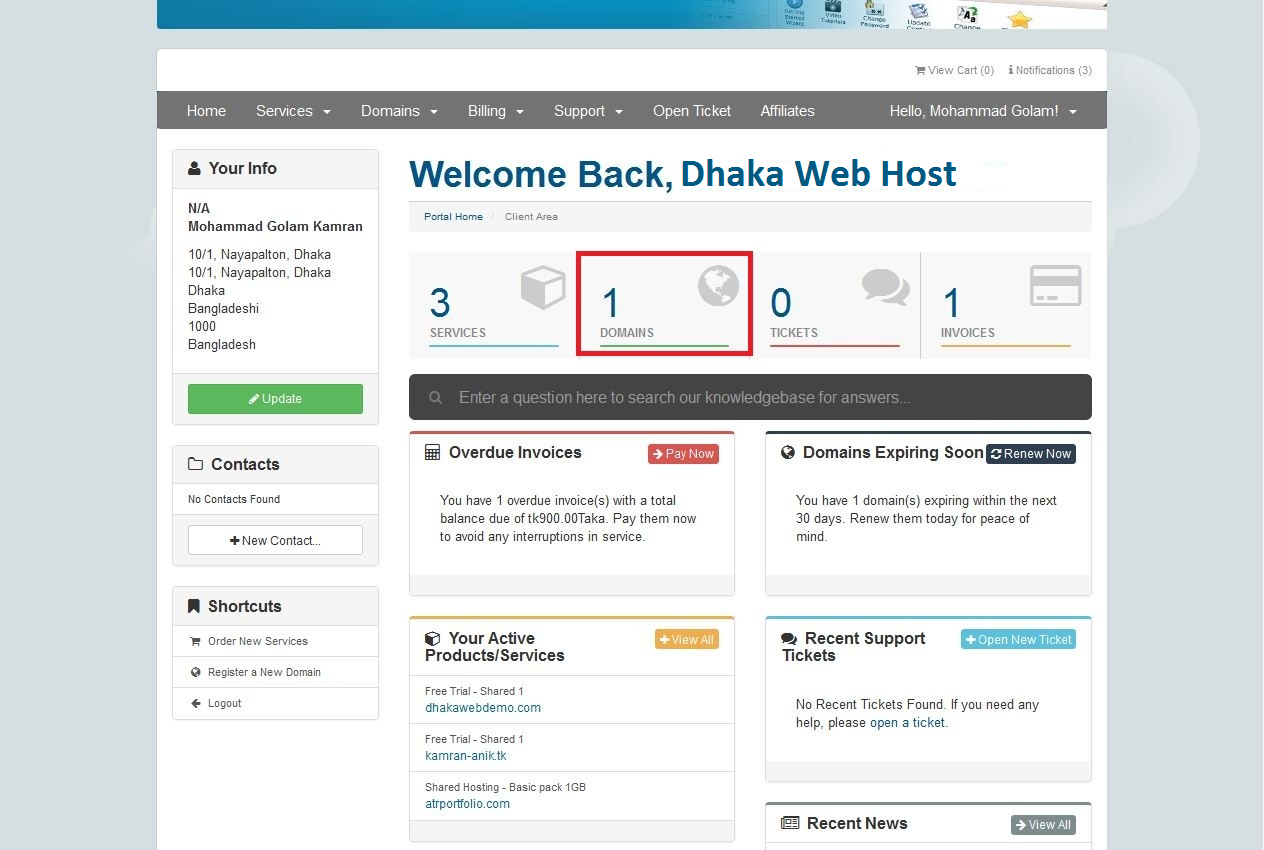
11. Click "Active" button from the right side your domain.
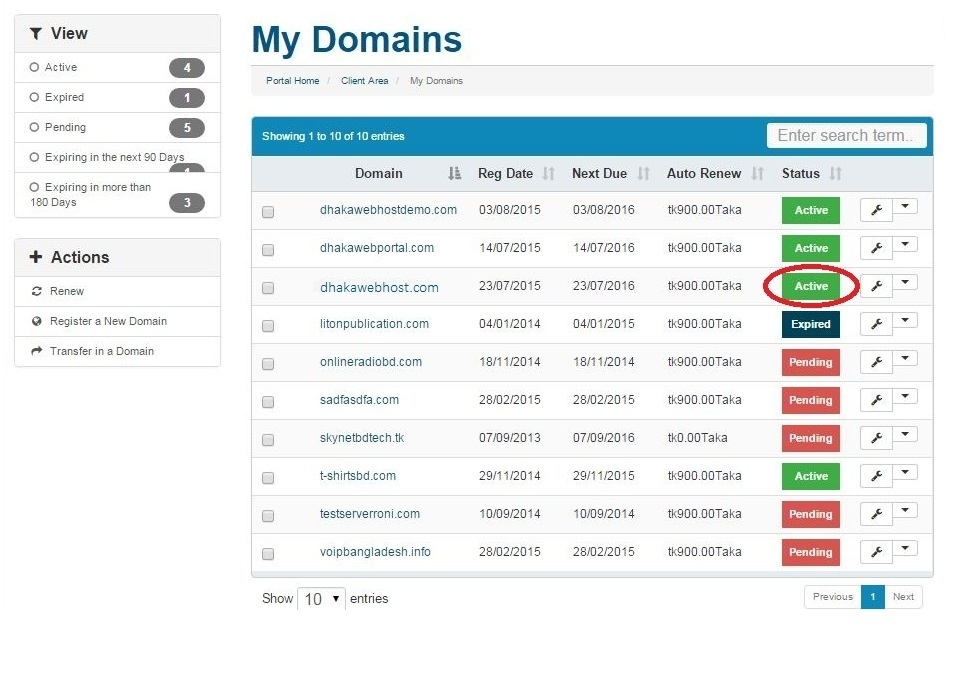
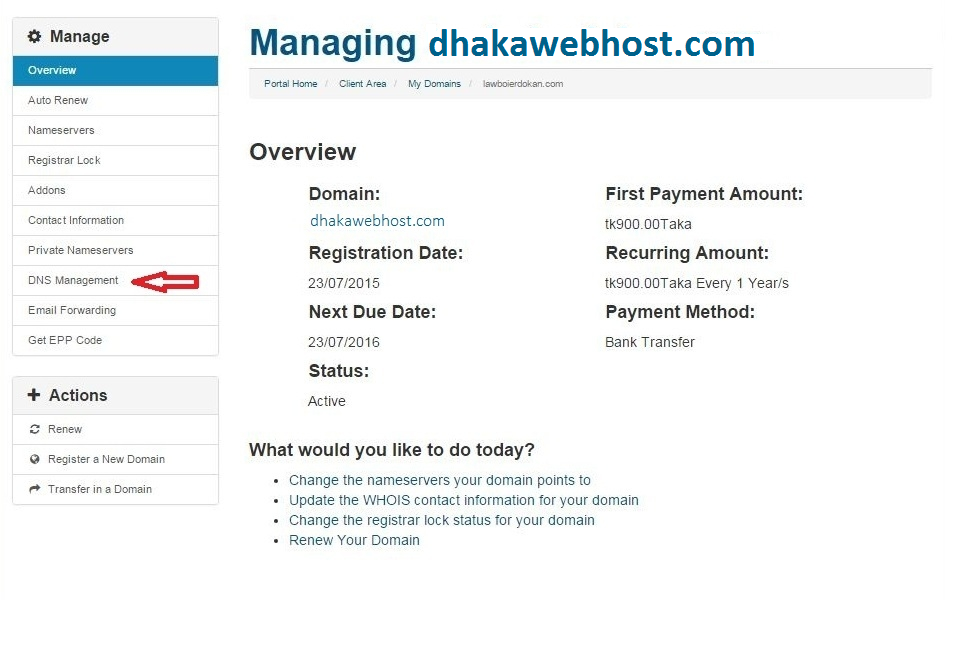
12. Click "DNS Management" to set the host name and destination you got in step 7.
13. Follow the image below and do exactly same. The ip addresses given here is deafult and you need to put them very carefully.
IP Addresses:
216.239.32.21
216.239.34.21
216.239.36.21
216.239.38.21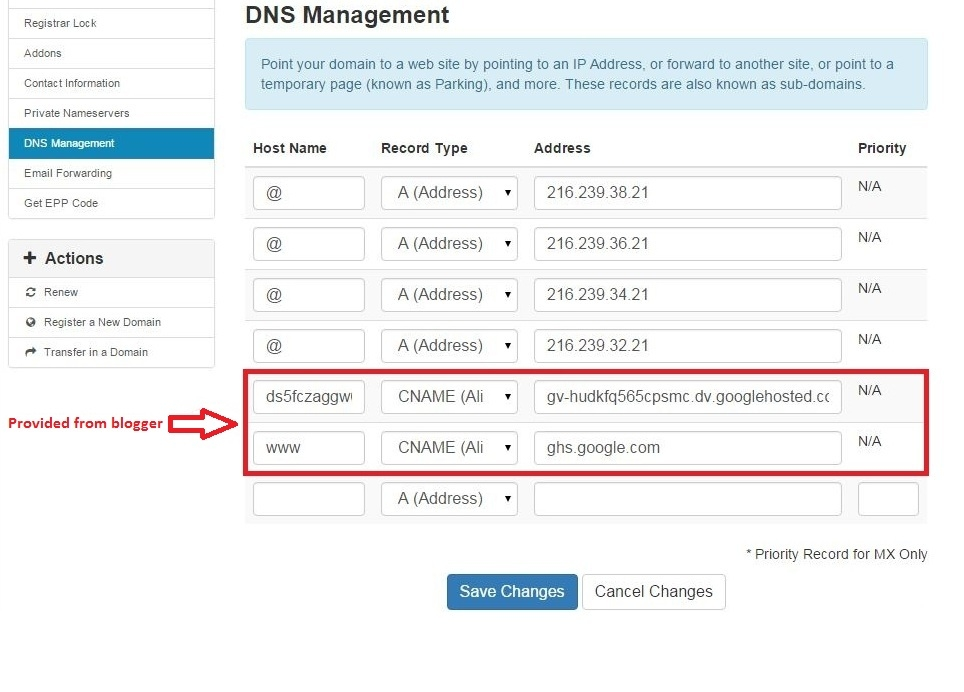
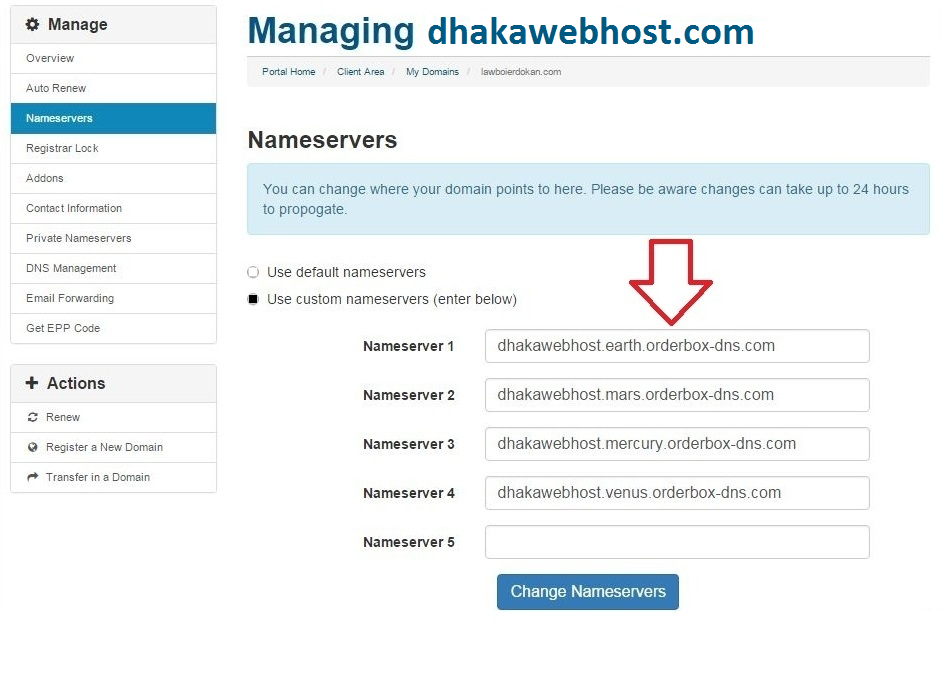
14. Now go to whois.net and enter your domain name to view domain registrar information. If you find the Registrar URL: https://www.publicdomainregistry.com just follow the nameservers given in the image below:
Default Nameserver for publicdomainregistry.com
dhakawebhost.earth.orderbox-dns.com
dhakawebhost.mars.orderbox-dns.com
dhakawebhost.mercury.orderbox-dns.com
dhakawebhost.venus.orderbox-dns.com
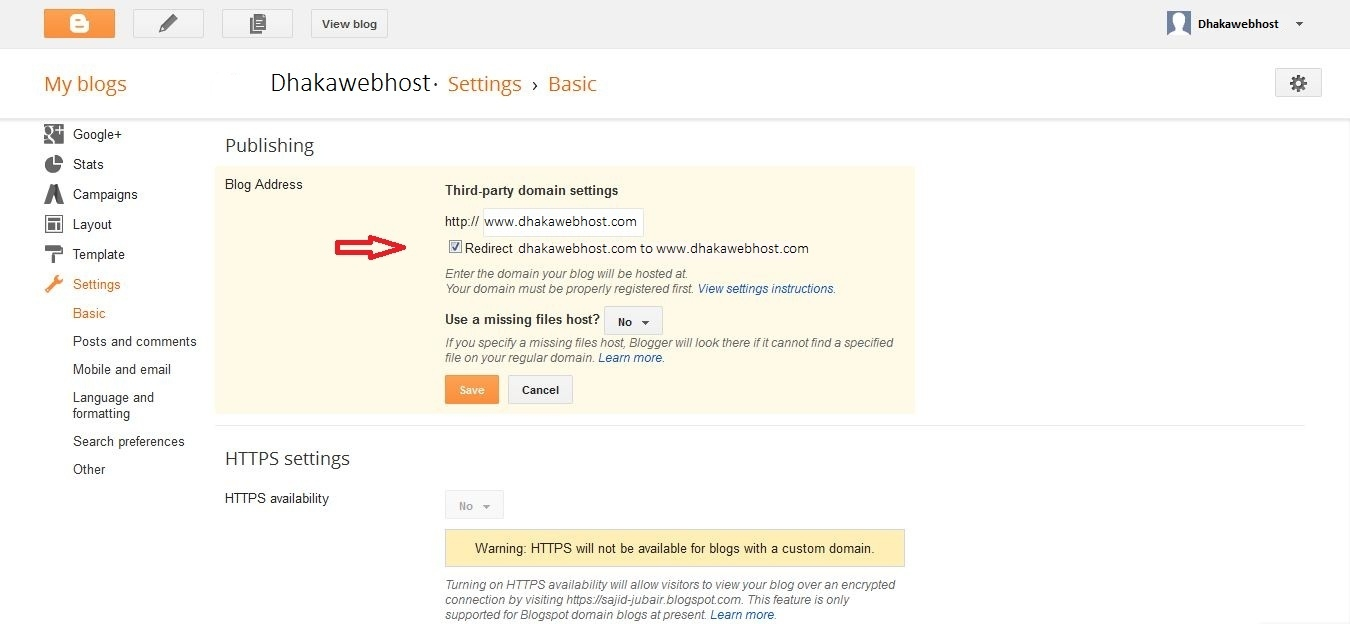
15. Now go to your blog and click "Save" which was incomplete in step 7 then you will redirect to the next page. Here you find your blogspot name and your domain provided in step 6.
16. Just click on yourname.blogspot.com to link the blog with your given domain.
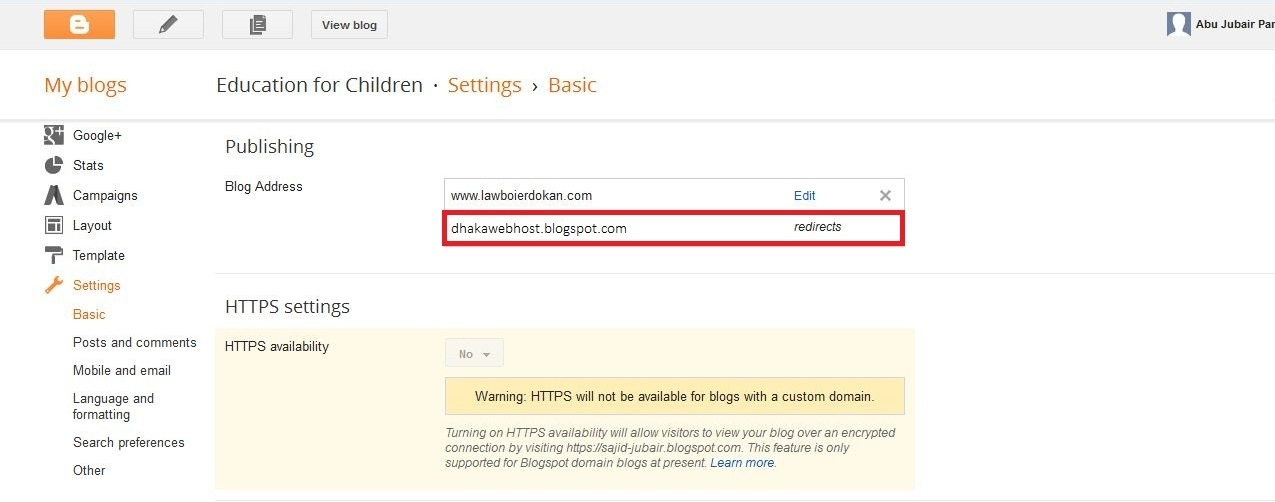
17. Select yourdomain.com to given domain.com and click "Save" to complete your setup.
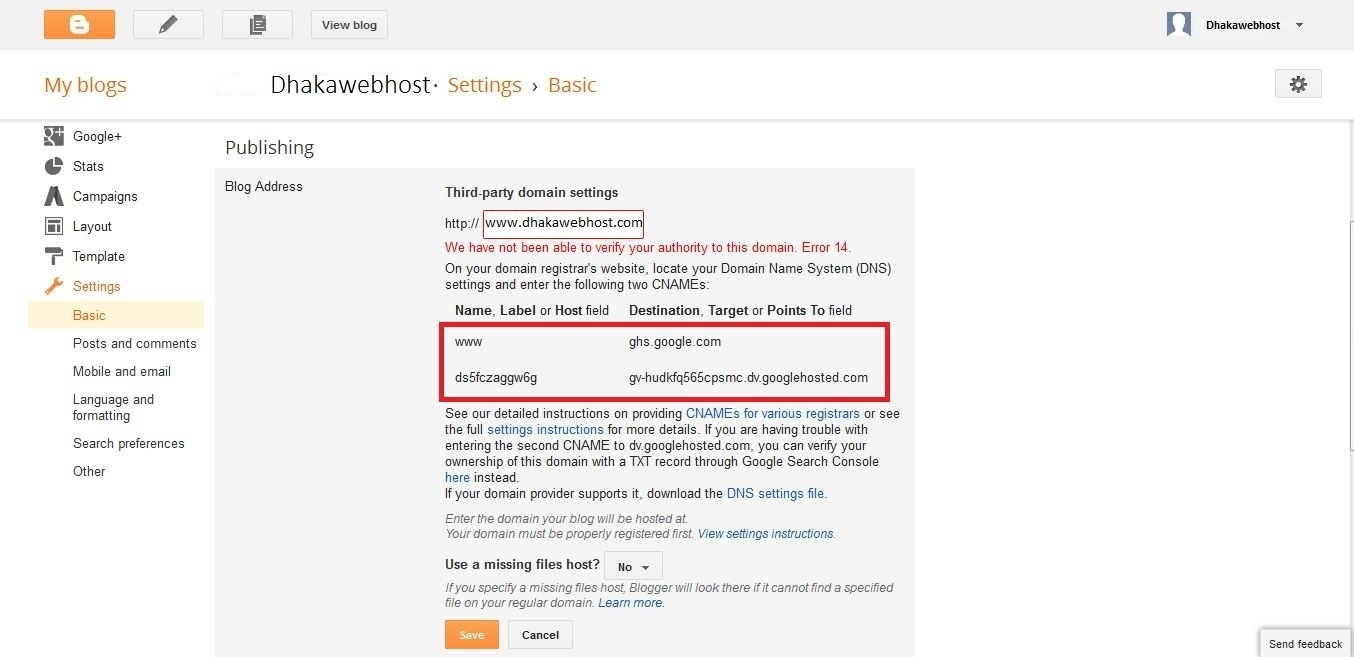
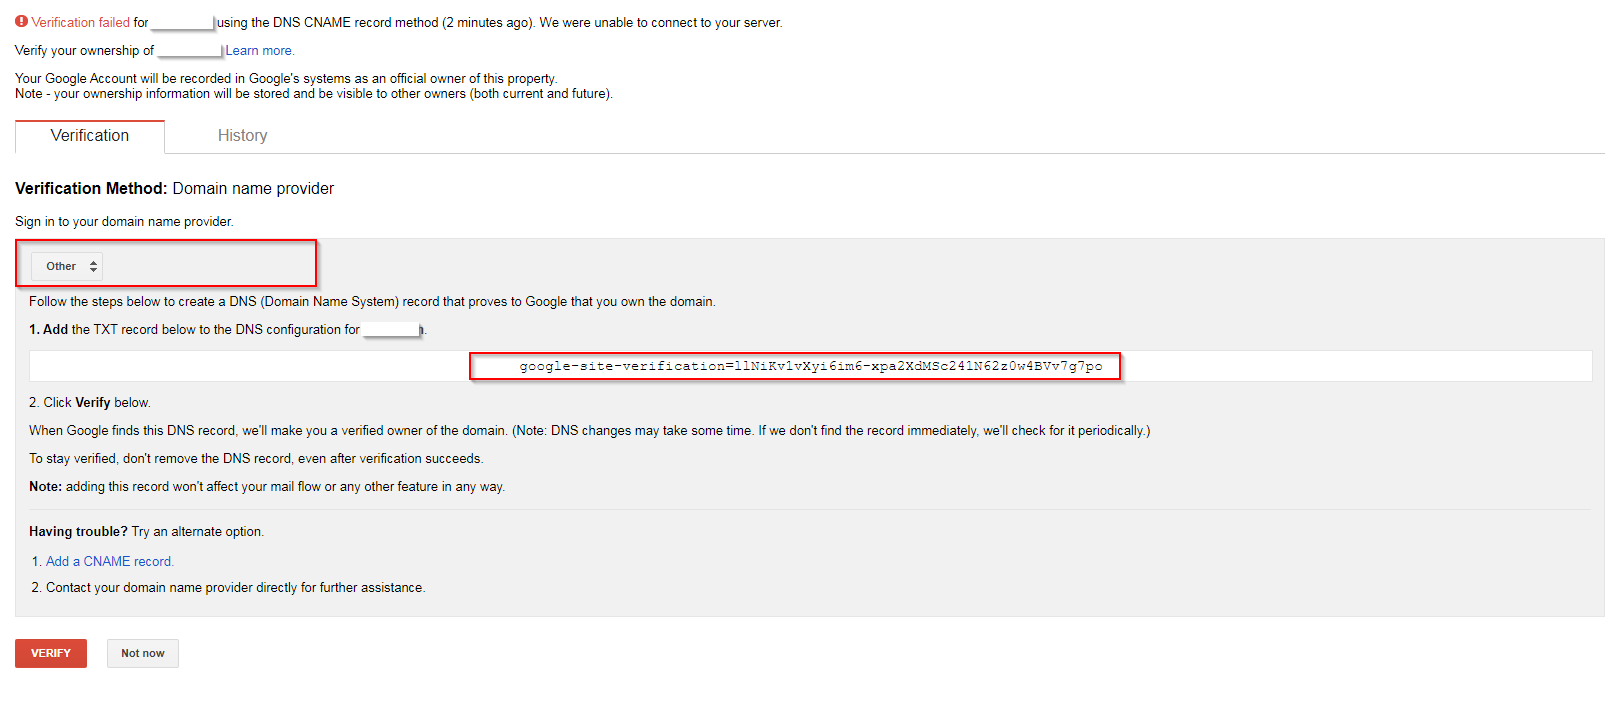
18. Generally it verifies the domain using the CNAME records but If you face any verification related issue such as We have not been able to verify your authority to this domain, then no need to worry about that. You can verify your ownership of the domain with a TXT record through google search console. When you will face the verification issue just read out the whole instruction and look for Google Search Console here instead. Click on here which will redirect you to google console page. Just see the both images given below and do the same showing in red mark area.
You can check CNAME records from here: CNAME records
You can also check your DNS from here: DNS lookup

From the image given below you need choss Other and you will get a TXT record to verify the ownership. Just copy the TXT record and add it to your DNS Management list. Check step 13 to review how to add records in DNS Management section. (Do not close the console tab)
Enter @ as Host Name, Choose SPF(TXT record) as Record Type, Enter the copied TXT record as Address and click Save Changes.
After adding the record in your DNS Management go to the console page again and click VERIFY (see the image)
If everything goes fine, you will see a message of complete ownership. Remember, after changing the information it will take upto 24 hours to complete the process and then your blog will become live.
Some helpful notes:
- If your new domain isn't taking you to your blog, wait another day or two to make sure all the DNS servers have been updated. If it still isn't working, contact your registrar to make sure you entered the DNS settings correctly.
- Your original Blogspot address will automatically forward to your new domain. That way, any existing links or bookmarks to your site will still work.
